Key Takeaways
- Re-grouting Importance: Proper re-grouting prevents water leaks, protects tile integrity, and enhances the overall aesthetics and functionality of your pool.
- Material Selection: Choose the right type of grout—sanded for larger joints and unsanded for smaller ones—to ensure durability and a seamless finish.
- Tools and Techniques: Essential tools include a grout saw, trowel, sponge, and sealant, while the process involves careful removal of old grout, proper application of new grout, and thorough curing.
- Maintenance Practices: Regular cleaning, inspections, water chemistry management, and sealant reapplication are crucial for prolonging the life of your grout and tiles.
- Common Challenges: Be aware of potential issues like water infiltration and uneven surfaces that can arise from poor grouting; addressing them promptly can prevent costly repairs.
- Community Engagement: Involve family and friends in the maintenance process to make it enjoyable and foster a sense of ownership in caring for your pool.
Maintaining a beautiful pool isn’t just about keeping the water clean; it’s also about ensuring the tiles look great and last long. Did you know that over 70% of pool owners face issues with cracked or discolored grout? This can lead to water leaks and costly repairs if left unattended.
Overview of Re-Grouting Pool Tiles
Re-grouting pool tiles involves replacing old, cracked, or discolored grout to maintain both appearance and functionality. Damage to grout can lead to water leaks, which causes larger issues over time. Over 70% of pool owners face these problems. Addressing grout issues promptly not only enhances the pool's look but also protects our investment in the long run.
We start the re-grouting process by gathering the necessary materials. This list includes:
- Grout: Choose a water-resistant type suitable for pools.
- Grout Saw: A specialized tool for removing old grout.
- Trowel: A flat tool for applying new grout.
- Sponge: For cleaning excess grout off tiles.
- Sealant: To protect grout from future damage.
Selecting the right materials plays a vital role in achieving long-lasting results. Our team can guide you in choosing the best options based on our specific pool type and usage.
Next, we move on to the techniques for re-grouting. The process begins with removing the old grout. Here, we use a grout saw to carefully scrape away the damaged material. Patience is key, as rushing may lead to scratching tiles. Once all the old grout is gone, we can clean the joints thoroughly, ensuring that no debris remains.
After cleaning, we prepare the new grout according to package instructions. Then we apply it using the trowel, firmly pressing it into the joints. We ensure the grout fills all gaps, which is crucial for preventing water intrusion. As we work, it’s essential to keep a damp sponge handy for wiping excess grout from the tile surface.
Next, allow the grout to cure as directed by the manufacturer—usually 24 to 72 hours. Curing time can vary depending on factors like humidity and temperature. After curing, applying a sealant helps protect new grout from moisture, stains, and algae growth. This step is often overlooked but can add years of life to our pool’s appearance and integrity.
We should all acknowledge common challenges in re-grouting. For instance, if it's our first time, we might feel overwhelmed. To keep spirits high, remember this: even the most seasoned DIYers started somewhere. Has anyone ever told you about the time they mixed too much water into the grout and ended up with a frothy mess? It's okay; we learn from these experiences.
Re-grouting is not just a task; it’s an opportunity to connect with our space. Whether it's a weekend project or a team effort, engaging in this process can strengthen our sense of ownership and pride in our pool. We often overlook these small maintenance tasks until they become pressing.
By regularly checking grout condition and re-grouting when necessary, we prolong the life of our pool. In doing so, we enhance both utility and aesthetics. Let’s remember that taking care of our pool is about enjoying quality time with family and friends. Who’s ready to dive headfirst into a re-grouting project?
Importance of Proper Grouting
Proper grouting plays a vital role in maintaining our pool’s aesthetics and functionality. It helps prevent water leaks and protects tile integrity. Investing in correct grouting methods keeps our pool in prime condition.
Benefits of Re-Grouting
Re-grouting offers several advantages. First, it enhances our pool's overall appearance by restoring its original look. Second, it prevents water from seeping through, which can lead to costly damage. Third, re-grouting creates a safer environment; cracked grout can create sharp edges or potential slips. Lastly, fresh grout adds to our pool's lifespan and saves us money on future repairs.
Common Issues from Poor Grouting
Poor grouting leads to an array of complications. One primary issue is water infiltration, which can cause hidden damage and mold growth. Cracked or crumbling grout impacts the pool's appearance and functionality. Not replacing damaged grout quickly can create bigger headaches down the line. Inconsistent grout also contributes to uneven surfaces, increasing the risk of slips. Just think about how frustrating it is to step on a tilting tile while enjoying a swim! Addressing these problems promptly keeps our pool safe and inviting.
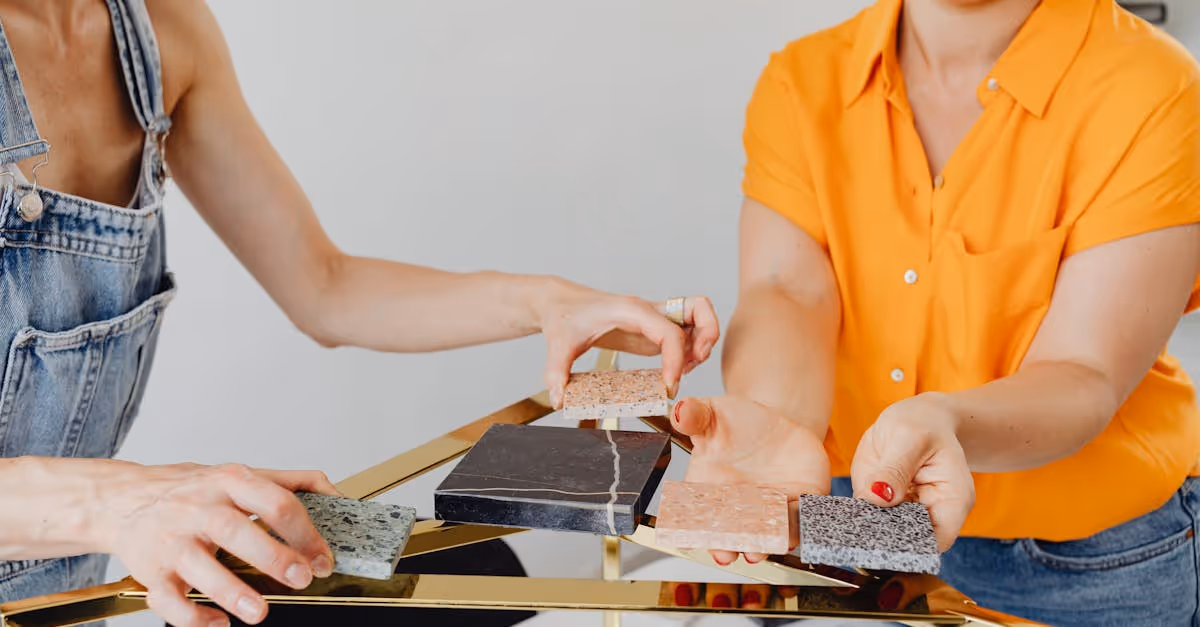
Materials Needed for Re-Grouting
When re-grouting pool tiles, selecting the right materials plays a crucial role in achieving durable results. Here's a breakdown of what we need.
Types of Grout
We primarily consider two types of grout: sanded and unsanded.
- Sanded Grout: This grout contains sand, making it ideal for larger joints. We use it where the gaps between tiles exceed 1/8 inch. Its sandiness helps provide strength, preventing shrinkage during the curing process.
- Unsanded Grout: Unsanded grout lacks sand and is perfect for smaller joints, typically less than 1/8 inch. We choose this option for delicate tiles, as it reduces the risk of scratching.
Both types come in various colors. A careful color selection enhances the aesthetics of our pool, making it more inviting.
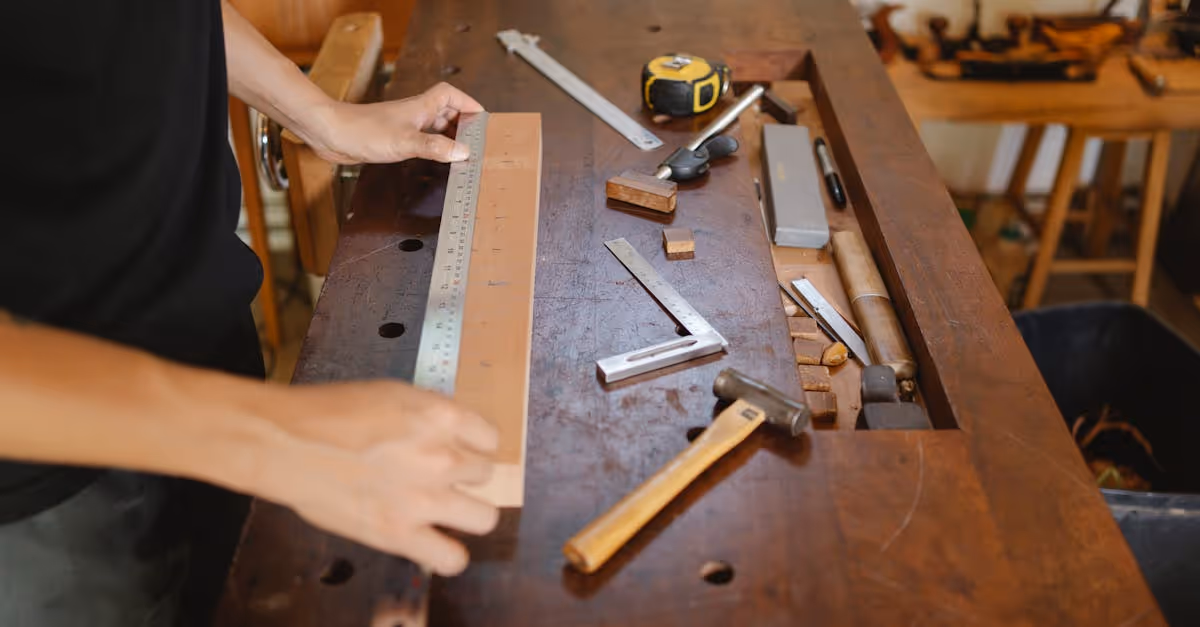
Tools and Equipment
Equipping ourselves with the right tools leads to a smoother re-grouting process. Here’s our necessary toolkit:
- Grout Saw: We use a grout saw for removing old grout. Its sharp blade effectively cuts through the old material.
- Trowel: A good trowel allows us to apply fresh grout evenly. A level surface makes all the difference.
- Sponge: Post-application cleanup is easy with a sponge. It helps remove excess grout and smooths the surface.
- Sealant: We apply sealant after the grout cures. This provides protection against moisture and stains, prolonging the life of our work.
With the right materials and tools in hand, we're on our way to restoring our pool tiles, keeping them not just functional but beautiful.
Step-by-Step Techniques for Re-Grouting
Re-grouting doesn’t have to be overwhelming. We break down the process into three clear steps: preparing the surface, applying the new grout, and finishing touches.
Preparing the Surface
Start by removing old grout with a grout saw. This step requires a gentle touch; avoid damaging the tiles. After clearing the grooves, we clean the joints with a sponge and warm water. Ensuring the surface is grime-free is key for new grout adhesion. A dry, clean area leads to better results. We can even let the area air dry for at least an hour. While this part may feel tedious, think of it as laying a solid foundation for future success.
Applying the New Grout
Next, we mix the new grout according to manufacturer instructions. A consistent, lump-free mixture is ideal for application. Using a trowel, we fill each groove completely. We’ll apply it at an angle for even coverage and press firmly to avoid air bubbles. Give each joint extra attention — they’re the superheroes of water resistance. Once filled, we can smooth the grout surface with a damp sponge and wipe away excess. Voila! We’re one step closer to that sparkling finish.
Finishing Touches
After allowing the grout to cure according to instructions, we apply a sealant for added protection. This step is crucial for preventing moisture from seeping through and causing future issues. We can use a small brush or applicator to ensure even distribution. Don’t forget to check for missed spots! In this final stage, we also admire our handiwork. A little celebration, perhaps with a refreshing drink by the pool, is in order! If we notice any uneven areas, we can sand them down gently after the grout has fully set. Now, our pool tiles are primed for enjoyment.
Maintenance Tips for Longevity
Keeping our pool tiles and grout in top shape requires regular maintenance. Simple habits help prolong the life of our newly re-grouted pool. Here are some maintenance tips for longevity:
- Regular Cleaning
Regularly clean tiles with a mild pH-balanced cleaner, avoiding harsh chemicals. Build-up can create stains that impact appearance and function.
- Routine Inspections
Inspect grout lines every few weeks for cracks or discoloration, which signal potential problems. Early detection helps us tackle issues before they escalate.
- Water Chemistry Management
Maintain balanced water chemistry. Proper pH and alkalinity levels prevent grout deterioration. This management leads to a balanced environment for our pool.
- Sealant Application
Reapply sealant every 6 to 12 months. The sealant protects grout from moisture and stains, extending its lifespan. Resealing is much easier than re-grouting.
- Avoid High-Pressure Washing
Refrain from using high-pressure washing on grout. This method can damage grout joints and tiles. A gentle cleaner and brush do the trick just as effectively.
- Limit Chemical Exposure
Limit exposure to harsh pool chemicals. Residue can harm grout integrity. Spillages should be rinsed immediately for better results.
- Use a Pool Cover
Use a pool cover to reduce debris and algae growth. Covers help safeguard tiles and grout from contaminants, making maintenance easier.
- Educate Others
Educate our family and friends about pool care. Awareness fosters a collective effort, ensuring everyone plays a role in maintaining our pool's beauty.
Each of these practices contributes to the longevity of our pool tiles and grout. By adopting these tips, we uphold both aesthetics and functionality, keeping our pool a pristine retreat.
Engaging in proper maintenance feels like gathering with friends and family for a weekend barbecue. Everyone chips in, making things easier and more enjoyable. Got a funny pool maintenance story? Share it with us! We’d love to hear how you turned pool cleaning into a community event—maybe a pool cleaning party complete with snacks? After all, who knew grout could be so much fun?
Let’s embrace these maintenance routines together, transforming our pools into sparkling retreats for relaxation and enjoyment.
Conclusion
Re-grouting our pool tiles is a rewarding project that not only enhances the beauty of our space but also ensures the longevity of our investment. By using the right materials and techniques we can prevent costly repairs and maintain a safe swimming environment.
Let’s embrace the opportunity to connect with our pool through this maintenance task. With regular inspections and timely re-grouting we can enjoy a sparkling retreat that brings joy to family and friends.
Together we can keep our pools inviting and functional for years to come.
Frequently Asked Questions
Why is re-grouting important for my pool?
Re-grouting is crucial for maintaining the appearance and functionality of your pool. It prevents water leaks, mold growth, and safety hazards caused by cracked grout, ultimately enhancing both the aesthetics and longevity of your pool.
What materials are needed for re-grouting?
You'll need water-resistant grout, a grout saw for removal, a trowel for application, a sponge for cleanup, and sealant for added protection. Selecting the right materials is essential for achieving durable results.
How do I start the re-grouting process?
Begin by carefully removing the old grout with a grout saw, then thoroughly clean the joints. Ensure all gaps are well-prepared before applying the new grout to ensure proper adhesion.
How long does the re-grouting process take?
The time required can vary but expect to spend a few hours on removal, cleaning, and applying new grout. Additionally, allow at least 24 to 48 hours for the grout to cure properly before using the pool.
How often should I re-grout my pool?
Inspect your pool tiles regularly, and consider re-grouting every 5 to 10 years, or sooner if you notice cracks or discoloration. Timely maintenance can prevent more significant issues and prolong your pool's life.
Can I re-grout my pool myself?
Yes, many pool owners tackle re-grouting as a DIY project. However, it requires patience and proper techniques. Following the right steps and using quality materials can lead to successful results.
What are the signs that I need to re-grout my pool?
Look for cracked, discolored, or crumbling grout, as well as signs of water leaking or mold growth. Regular inspections will help you catch these issues early.
How can I maintain my newly re-grouted pool?
To maintain your newly re-grouted pool, regularly clean it with mild pH-balanced cleaners, manage water chemistry, and reapply sealant every 6 to 12 months to protect against moisture and stains.